Sierra and High Sierra
Editing Incoming/Outgoing settings in Sierra and High Sierra
These instructions have been tested up to Mail version 11.5 and High-Sierra 10.13.6.
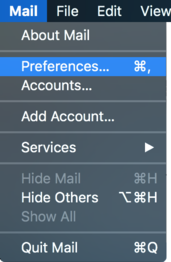
- Open the Apple Mail application by clicking Mail in the top menu bar.
- Select the Preferences option.
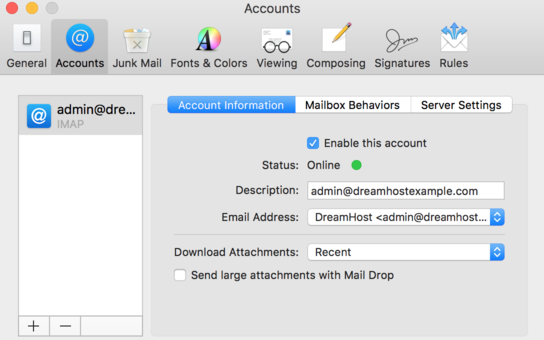
- The Accounts page opens:
- Click the @ Accounts option in the top bar.
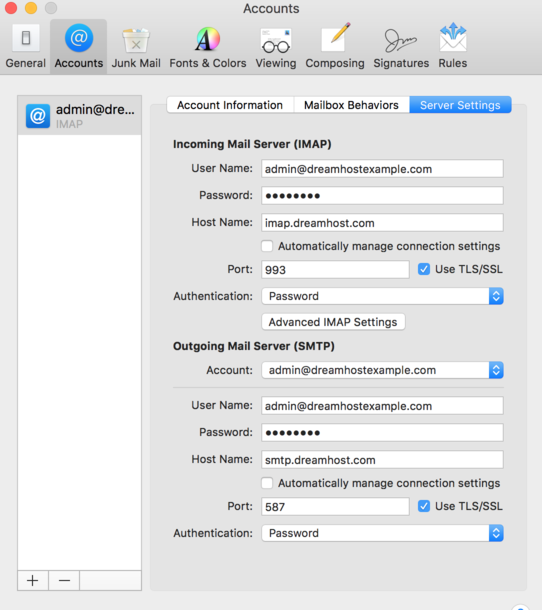
- Click the 'Server Settings' tab.
- Edit the Host Name fields to match your RockNspace mail server name.
- To edit the Incoming/Outgoing ports, UN-check 'Automatically manage connection settings'. The 'Port' field and 'Use TLS/SSL' checkbox then appear.
El Capitan
Editing existing Incoming settings in El Capitan
- Open the Apple Mail application by clicking Mail in the top menu bar.
- Select the Preferences option.
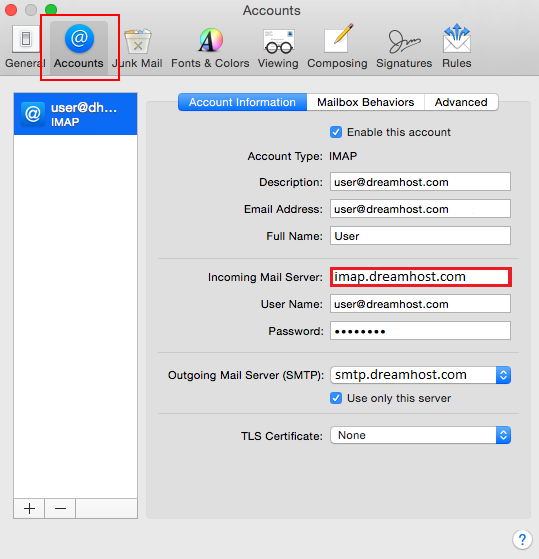
- The Accounts page opens:
- Here you can edit the incoming server name. View the Email Server name table to ensure you're using the correct server name. It is either imap.dreamhost.com or pop.dreamhost.com for SSL setups.
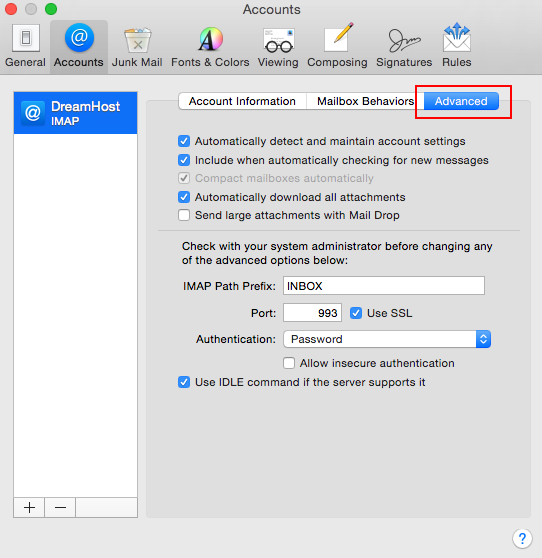
- To edit the port number, click the @ Accounts option in the top bar.
- Click the Advanced tab in the upper right.
- Edit the incoming Port number and enable/disable SSL by selecting/deselecting the Use SSLbox, as needed.
Editing pre-existing SMTP (Outgoing) settings in El Capitan
- Open the Apple Mail application by clicking Mail in the top menu bar.
- Select the Preferences option.
- The Accounts page opens:
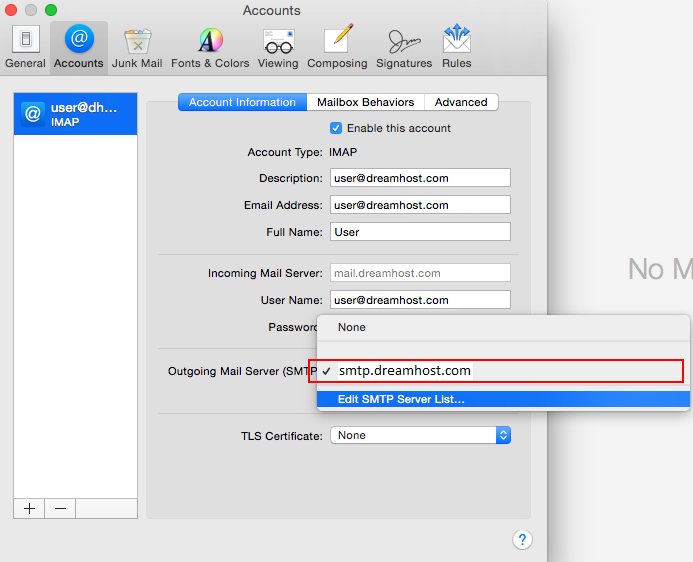
- Click the @ Accounts option in the top bar.
- Select your outgoing mail server from the available options within the Outgoing Mail Server (SMTP) drop-down list. This should be smtp.dreamhost.com.
- Click the drop-down again and select Edit SMTP Server List...
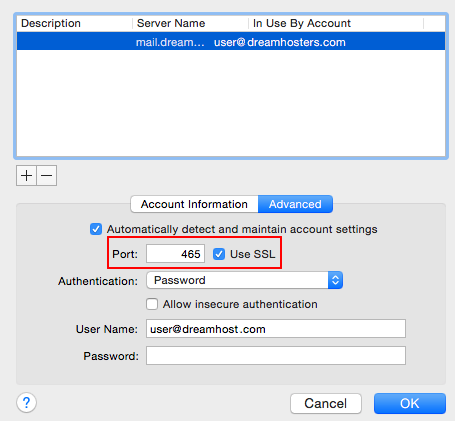
- The Account Information page opens:
- Click the Advanced tab.
- Edit the incoming SMTP Port number and enable/disable SSL by selecting/deselecting the Use SSL box, as needed.
- Make sure 'Password' is selected in the 'Authentication' drop-down.

